The reverse sear process will help you hit your doneness targets more easily. So much of cooking a beef roast is about the challenge of getting it done to the liking of your loved ones or friends. Reverse sear combines the benefits of smoking with the advantages of grilling. Tender and juicy on the inside. A great, smokey char on the outside. Nothing better than a reverse sear Tri-Tip.
Seasoning
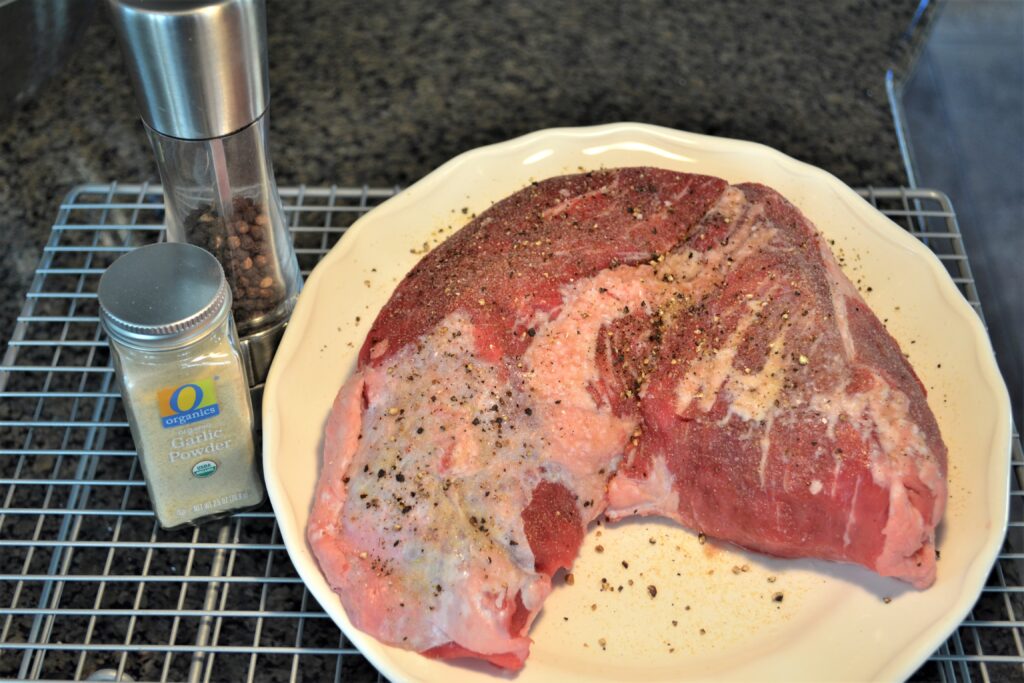
Begin by salting the meat overnight. This will help to ensure the beef retains its moisture. And your reverse sear Tri-Tip will be juicy and tender. Learn more about the advantages of dry brining. Season the Tri-Tip with a rub of your choice. Discover more about rubs. Or the simple seasoning solution is just a light dusting of garlic powder and a liberal coating of freshly ground black pepper. A reliable option.
Smoke
Fire up your pellet grill and set the temperature to 250 F | 121 C. Load up some oak wood or the wood of your choice. Discover more about wood choices. If your grill has an onboard temperature monitor, insert the probe through the side of the roast until you reach the center. Set the internal temperature target to 100 F | 38 C. So what happens next is, the smoker will bring the internal temperature of your roast from refrigerator temperature of around 39 F | 4 C up to 100 F | 38 C while bathing it in some delicious SmokeyGood-ness. How long will this take, you ask? It depends on the thickness and density of your particular roast. When your Tri-Tip hits the 100 F | 38 C mark, remove it from the smoker, and set it aside.
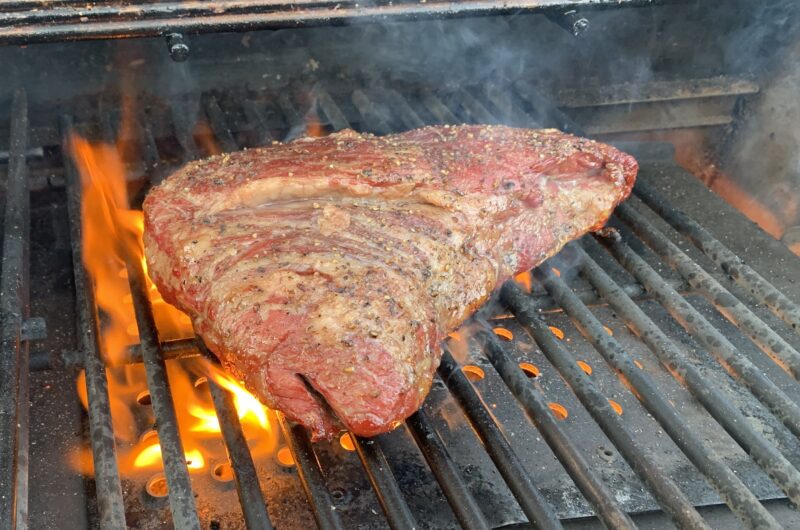
Sear
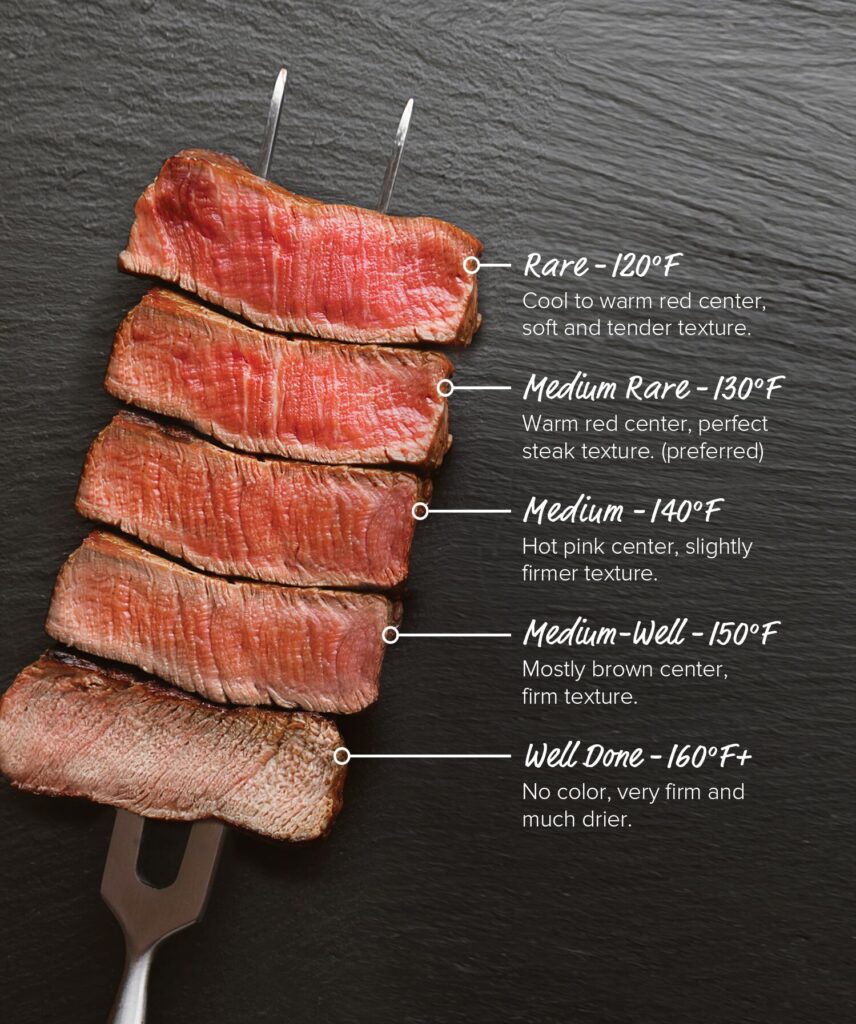
Now that your roast has a nice mahogany color and smokey exterior it is time for the sear. The sear will add a nice charred flavor. It will also finish the cooking process. This is where you need to decide what your target temperature is. Here is an easy to follow guide for steaks that will work for your roast as well.
Now you need to decide how you will sear your roast to the target doneness level. If your pellet grill has the option of “open flame” cooking then set that up and start your sear. If not here are a couple of other options. Slide a cast iron frying pan into your pellet grill and move the temperature up to the highest level. Give the pan a light coating of vegetable oil – something with a high smoke point like canola oil, corn oil, or peanut oil. The third option for this searing step would be your old gas grill. That’s right. When you got your new pellet grill you kept the old Weber just in case right? Dust it off and crank it up to the highest level and get ready to sear that Tri-Tip.
Searing is simple. Using a pair of tongs (you don’t want to puncture this roast with a fork and release the juices) just keep the meat over the high heat until a light char develops then flip. You can even char the edges of the roast if you are keen.
Now here is the tricky bit. While you are searing the internal temperature is rising fairly quickly. Keep your instant-read thermometer on hand to check progress regularly. And remember, your roast will keep on cooking even after you remove it from the fire. Always subtract 5 degrees from your target temperature. So for a 140 F | 60 C medium roast, you will want to remove it from the fire around 135 F | 57 C.
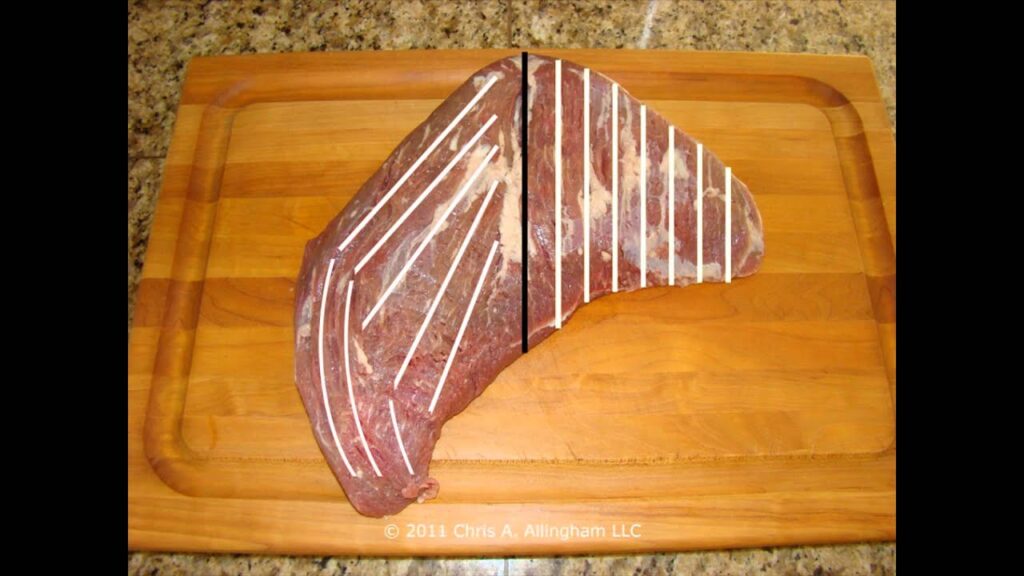
Let it rest for no more than 5 minutes, then carve and enjoy!
Recent Comments