
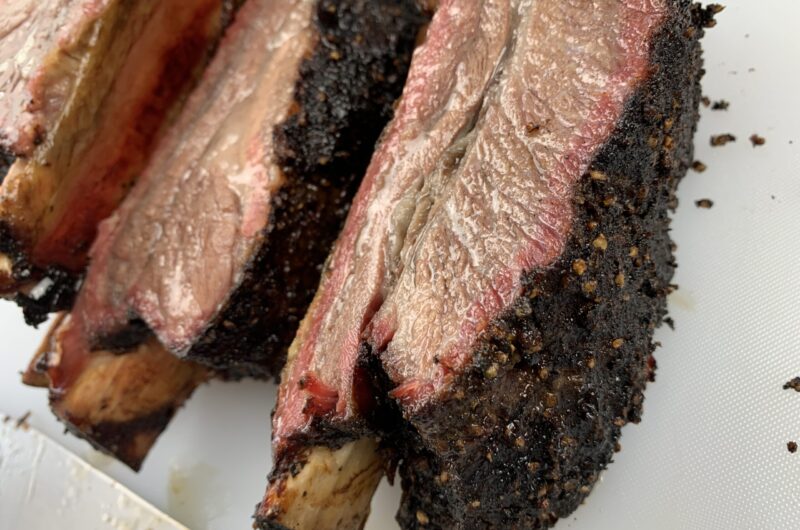
If you want to serve the absolute show-stopper of backyard barbecue—a piece of meat that makes everyone stop what they are doing to pull out their cell phones and take a picture—you don’t buy a brisket or a pork shoulder. You buy a three-bone slab of Beef Plate Short Ribs.
Often called “Brontosaurus Ribs” or “Dino Ribs” because of their massive size, these are the heaviest, thickest, and meatiest ribs on the entire animal. We are talking about a literal three-inch layer of solid, beautifully marbled beef sitting directly on top of giant, flat bones.
When smoked low-and-slow over a real hardwood fire, the meat pulls back, the fat renders completely, and you are left with a deep, dark bark and a melt-in-your-mouth texture that matches the finest central Texas brisket.
Because they are a premium specialty cut, smoking them requires a specific technical blueprint. Here is my foolproof, step-by-step masterclass to getting perfect, juicy Dino ribs on your pellet grill.The best beef flavor ever!!
[As an Amazon Associate and brand partner, I earn from qualifying purchases]
The Dino Rib Toolkit: What You Need
Because plate ribs render out a massive amount of hot liquid fat over a long cook, you cannot treat them like a standard rack of pork ribs. You need the right gear setup:
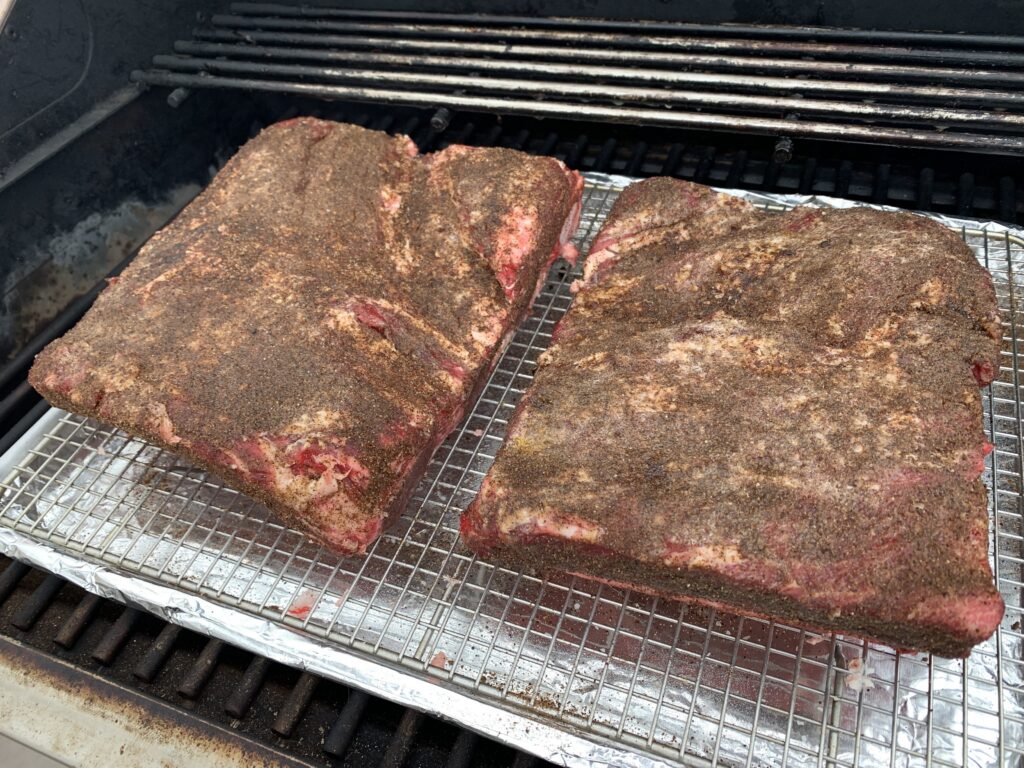
- The Pan & Rack System: Never place plate ribs directly onto your bare factory grates. Line a commercial baking sheet with a layer of Reynolds Pitmaster Heavy Duty Foil, drop a Stainless Steel Nesting Wire Rack on top, and sit your ribs on the wire. This allows 360-degree smoke circulation to build your bark while catching 100% of the rendered beef fat to protect your Yoder or Traeger from a grease fire.
- An Instant-Read Thermometer: Plate ribs cannot be cooked by a clock. You must use a precision Instant-Read Meat Thermometer to track your internal targets. This isn’t just about food safety; it’s about knowing exactly when the internal collagen has completely melted.
- Heavy Duty Leather Pit Gloves: When managing a heavy, grease-filled pan assembly or shifting a blazing hot diffuser plate, you need insulated forearm armor like these.
Step 1: The Night Before Prep & Dry Brining
Start your preparation 12 to 24 hours before your cook to ensure maximum internal juiciness.
- Trim the Fat Cap: Plate ribs come from the butcher with a thick, waxy fat cap on top. Unlike brisket fat, this top layer will not render down during the cook. Take a sharp knife and trim it away in smooth layers until you expose the beautiful red meat below. If possible, try to peel away the tough silver skin as well. (Note: Leave the thick membrane on the bottom bone side completely intact! It is the structural glue that holds the meat to the bone as it cooks).
- The Overnight Dry Brine: Set your trimmed rack onto your stainless steel wire rack. Cover the bare meat with an ample, uniform coating of coarse Kosher salt. Be liberal here—this is a massive, thick muscle.
- The Refrigerator Rest: Slide the entire pan assembly straight into your refrigerator uncovered overnight. This allows the dry brine process to pull the salt deep into the muscle fibers while the cold air dries out the surface skin for a superior crunch.
Step 2: The Next Morning Rub Application
The next morning, grab that pan of dino ribs out of the refrigerator and set them out to warm up a bit before they head for the pit. You will notice the surface moisture has vanished and the meat has absorbed the salt.
- The Binder: Give the meat a light, even spray with Pam Cooking Spray to act as a quick adhesive layer.
- Apply the Bark Layer: Shake on an even sprinkle of garlic powder, and finish with a healthy, heavy layer of fresh ground black pepper to form that classic Texas-style beef rub. Be careful not to use pre-made commercial rubs that contain extra salt in addition to your overnight brine!
Step 3: Firing Up the Pit
Next, fire up your pellet smoker and preheat it to 250°F (121°C) using a premium, clean-burning hardwood like Bear Mountain oak or hickory pellets. Pick up your entire aluminum pan and wire rack assembly and set it right onto your factory grill grates. Close the lid, walk away, and go enjoy your day. Is your pellet hopper full?
Step 4: Pushing to the 200°F Target
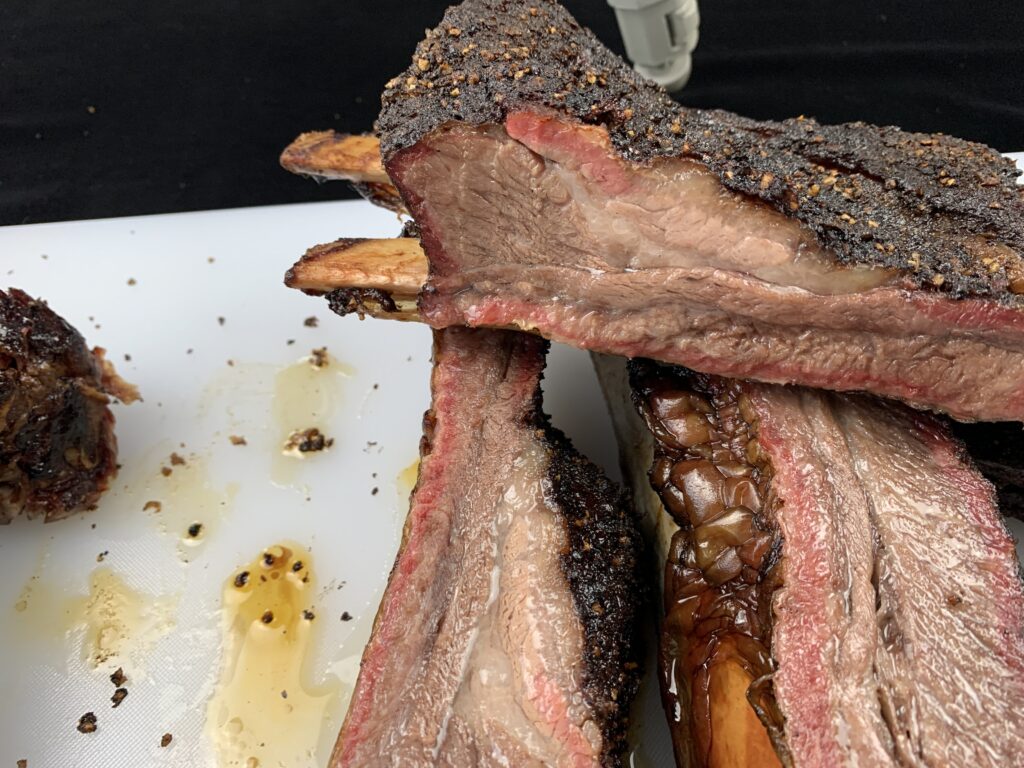
As the plate ribs smoke over the next 7 to 9 hours, the meat will slowly begin to shrink and pull back down the bone, exposing several inches of clean white bone at the tips. This is completely normal and exactly what you want to see!
Around the 6-hour mark, your bark should be completely set into a dark, beautiful mahogany crust.
Take your instant-read meat thermometer and slide the probe into the thickest center part of the meat between the bones. Our final target internal temperature is 200°F to 203°F (93°C). When the probe slides into the beef with absolutely zero resistance—feeling exactly like a warm stick of butter—your ribs are officially finished.
The Easy Victory Cleanup
Pull the entire baking pan out of the smoker using your long leather gloves and carry it straight into the air conditioning. Let the meat rest on your counter for 20 minutes before slicing so the juices can redistribute through the muscle.
While your guests are devouring those giant, smoky dinosaur bones, your cleanup is already done. Simply wait for the pan to cool, peel the fat-soaked heavy-duty foil off the aluminum sheet, and roll it straight into the trash can. Soak the stainless wire rack in warm soapy water for 15 minutes, run a scrub brush down the bars, and your kitchen is clear!
It appears you have a big appetite for beefy SmokeyGoodness! Check out this brisket post!
How about something sweet for after dinner? SmokeyGood Smoked Cinnamon Apple Crisp, anyone?
Published by SmokeyGood
Recent Comments