
(The Ultimate Vacuum Sealer Guide)
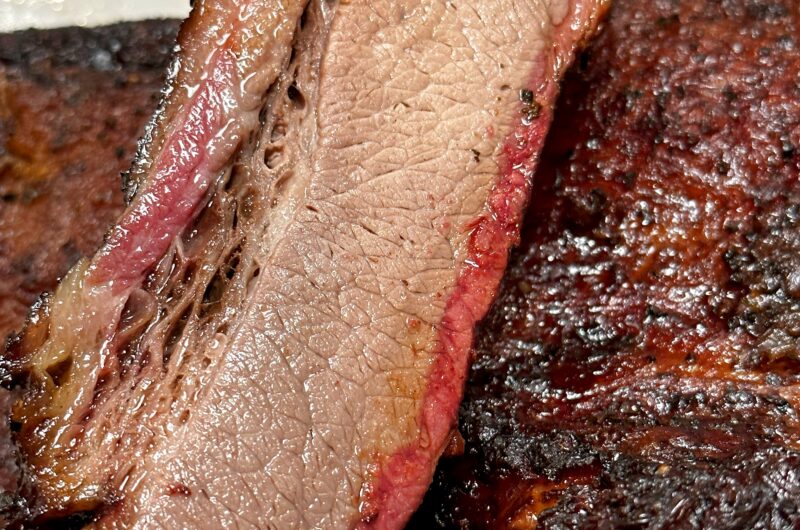
Smoking a massive, whole packer brisket is a true labor of love. You commit 12 to 14 hours of meticulous fire management, split pristine hardwood logs, monitor internal rendering metrics, and endure the brutal brisket stall to achieve juicy, competition-grade perfection.
But unless you are feeding an entire neighborhood block party, you are going to end up with a mountain of leftover beef.
This is where amateur cooks completely ruin their hard work. Shoving premium smoked brisket slices into generic zip-top bags or reusable silicone pouches is a rookie mistake. Standard storage bags trap ambient oxygen inside with the meat, leading to rapid oxidation, freezer burn, and a total loss of that beautiful, rendered fat moisture.
You don’t have to settle for dry, rubbery leftovers. By upgrading your kitchen toolkit to a commercial-grade Vacuum Sealer System, you can eliminate oxygen exposure, lock in the rich wood-smoke juices, and preserve your brisket for months.
Here is my exact, step-by-step blueprint to preserving your wood-fired leftovers like a professional pitmaster.
[As an Amazon Associate and brand partner, I earn from qualifying purchases]
The Science of Vacuum Sealing Barbecue
The reason vacuum sealing is the gold standard for pitmasters comes down to simple food-retention physics. When you use a mechanical vacuum sealer, the machine doesn’t just close the bag; it forcefully evacuates 100% of the internal atmospheric air currents before melting an airtight heating seam across the plastic.
By removing the oxygen, you achieve three massive advantages:
- Total Elimination of Freezer Burn: Freezer burn happens when cold, dry air sublimates the moisture out of the surface of your food. A vacuum-sealed chamber forms an absolute barrier, keeping your brisket looking and tasting exactly like it did the hour it came off the Yoder or Traeger grates.
- Fat Stabilization: Smoked beef fat is highly susceptible to turning rancid when exposed to open air over time. Vacuum sealing locks the fats in a suspended state, maintaining that rich, buttery mouthfeel.
- The Perfect Reheat Highway (Sous Vide): This is the ultimate secret loop. When you want to eat your leftovers, you don’t use a microwave (which boils the meat from the inside out and ruins the texture). Instead, you drop your frozen, vacuum-sealed bag straight into a pot of simmering water for 20 minutes. The meat gently warms inside its own sealed juices, yielding a slice that tastes identical to day-one flat and point!


The Preservation Toolkit: What You Need
I invested in my heavy-duty vacuum sealer system back in 2022, and it has easily saved me hundreds of dollars in protected meat assets. To run this system seamlessly in your kitchen, here is the exact hardware setup running inside the SmokeyGood space:
- The Engine [Anova Culinary Precision Vacuum Sealer Pro]: This is the heavy-duty engine built for heavy kitchen workloads. It features a high-power commercial vacuum pump, a reliable double heat sealer to lock past oily juices, internal bag storage with a built-in sliding cutter, and a specialized wet-food suction mode that ensures airtight seals on juicy brisket flats without choking the pump.
- The Armor Guard [Heavy-Duty Vacuum Sealer Bag Rolls]: Do not buy cheap, thin bags. You want commercial-grade, multi-ply BPA-free bags with textured air-removal channels. I highly recommend using custom bag rolls so you can cut the exact length needed to fit a massive, uncut brisket flat.
How to Seal and Freeze Brisket Like a Pro
- Let the Meat Cool Completely: Never vacuum seal a scorching hot brisket straight off the smoker. The intense heat will create steam inside the bag, which turns into water pockets that ruin the bark and expand during freezing. Let the meat rest in the refrigerator until it is cold and firm.
- Size Your Bags Generously: Cut a piece of vacuum bag roll that leaves at least 3 inches of extra empty space at the top. The machine needs that extra clearance to properly grip the plastic and draw a clean vacuum line.
- Portion Into Single-Meal Blocks: Slice your brisket into 1-pound or 2-pound blocks (separate your flat slices from your chopped point burnt ends). This allows you to thaw out the exact amount you need for a quick weekday lunch without opening your entire reserve stock.
- Execute the Seal: Slide the open edge of the bag flat into the vacuum channel track. Select the “Moist” setting on your Anova Pro interface, press down to close, and activate the automatic loop. Watch the machine pull the plastic tight against the grain of the beef, and wait for the double-heating wire indicator light to turn off.
- Label and Freeze: Use a permanent marker to write the cut type and the exact smoke date straight onto the white label track of the bag, then lay it flat in your freezer.
Are you a beef fan? Check out these amazing Plate Beef Ribs!
Looking for other valuable tips to make your backyard cooking easier? Check these out…
Dodge the mess with this Pan and Rack system.
This type of Instant Read Thermometer is a must.
Published by SmokeyGood
Recent Comments